While there’s no V in the name, SPC flooring is actually a form of vinyl. SPC means Stone Plastic Composite, and the name has to do with the composition of the core. Simply put, flooring this class has a rigid core, which makes it an excellent choice for high-traffic areas in your home and can also be installed over almost any existing hard surface subfloor.
SPC flooring contains a solid, waterproof core that won’t ripple or swell no matter how much liquid you subject it to. This core is ultra-dense with no foaming agents like you’ll find in traditional WPC flooring. It gives you slightly less softness underfoot, but it makes the flooring extra durable.
● Waterproof
● Great for uneven subfloors
● Ultra-durable
● Realistic wood and stone looks
● Low-maintenance
● Easy installation
If you feel comfortable using basic power tools and don’t have any back issues, you should be able to install SPC flooring without bringing in a professional. These rigid boards have click-lock edges that make installation a fairly easy for even the novice of home remodelers.
● Utility Knife Straight Edge Measuring Tape
● ¼" Spacers Pencils Eye Protection
● Soft-Faced Rubber Mallet Broom Felt Pads
● You may also need: Jig Saw, Table Saw, Miter Saw, Circular Saw, Hole Saw, Moisture Meter

Before you begin with the installation, thoroughly preparing for it is the first step. The tools that you need include; utility knife, measuring tape, cutting tools for cutting around irregularly shaped objects, baseboards, spacers, and transition moldings.
The next thing you need to do before installing the flooring, horizontally place the SPC in the area where you wish to install it. Make sure the temperature of the room stays within the range of 18ºC to 22ºC. It is a 48-hour acclimatization period. It is best not to remove the planks from the box during this time.
Preparing the subflooring is an essential step in the installation of the SPC flooring. The subfloor must be perfectly clean, dry, smooth, and 100-percent solid before you begin installing the SPC flooring planks. Ensure that the subfloor is flat and within a tolerance of 3mm. If the subfloor does not meet the conditions, it will prevent SPC from locking to it. If the subflooring is concrete, it requires to go through a curing period of 60 days. Applying a polyethylene, 0.6mm thick, is absolutely necessary when installing the SPC planks on a cemented subfloor.
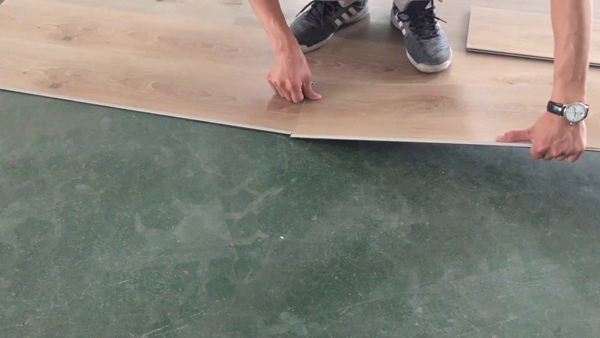
The right approach is to begin installing the planks from a corner. Place the planks in a manner that the tongue is away from the wall. The installation must proceed with the way. As the planks will expand and contract due to temperature fluctuations, make sure you leave a gap of 10mm. Use the transition moldings or baseboards to cover the expansion gap. While installing the first row, insert the tongue into the grooves for interlocking the short ends. The recommended angle is 15º. Line up sequential plank evenly on the short end and place the first row along the chosen wall. Ensure the expansion gap using spacers. The seams between planks are to be kept tightly, a clicking sign is an indication that the seam is tight. Do not forget to stagger the rows to prevent the short edge seams from forming a straight uniform line.
For the second row, start with measuring and marking the planks. Using a utility knife cut the plank. The first plank of the second row must interlock at a 15º angle. The next series of planks must interlock from the short end first so that is can easily slide into the longer side. The third row will start from the last plank of the second row.
You need to follow the same steps for installation of all the rows until the area is fully covered the super-durable SPC flooring!
For more information about HOW TO INSTALL SPC FLOORING, feel free to contact us.